Pond Liner Repair
How to successfully repair the pond liner
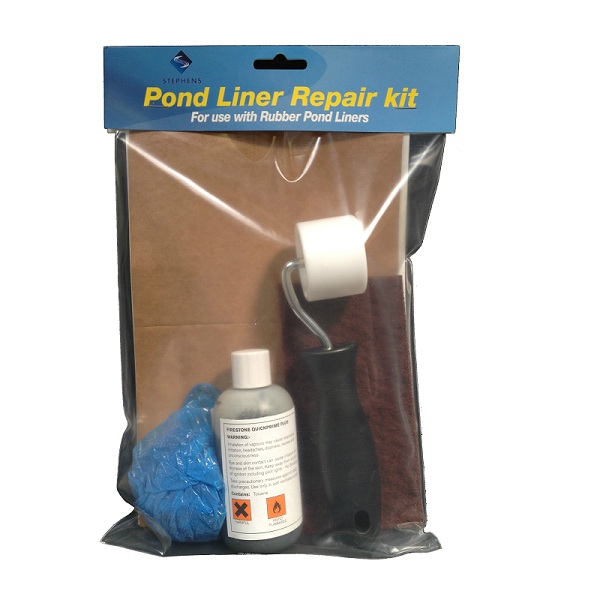
Although pond liners are durable (especially when used with protective matting), they can occasionally get holes in them from a displaced stone or rock, or if an animal has been in the water. The good news is that these holes in the pond liner are fairly easy to repair and we supply pond liner repair kits to do the job.
For a successful pond liner repair, prior to repairing your liner, you need to ascertain where the hole is. It could be a large hole or a tiny pinprick. To do this, turn off any pumps and allow the water level to drop until it stabilises. At this point the hole will be at the waterline, so you should carefully look at the liner all the way around the pond to find the hole.
If you can’t find the hole but the water level is falling rapidly, you can add a little milk to the pond water (while the hole is above the waterline). The milk will be dragged towards the hole, identifying it.
Once you have identified the hole, there are two methods for repairing a pond liner:
Pond Liner Repair Tape
Otherwise known as QuickSeam Form Flash, we supply this repair tape as part of our EPDM Pond Liner Repair Kit (for use on Elevate and SealEco EPDM). It’s the quickest and easiest method for repairing small holes, especially with the pond repair kit.
Using Pond Liner Repair Tape:
- Cut the QuickSeam Form Flash down to create a patch the size required to ensure the hole is well covered. Round the corners of the patch (the rounded corners are less likely to catch against anything and pull the patch off).
- Clean the area to be repaired, removing all dirt, grime and algae.
- Add a small amount of the QuickPrime Plus onto the QuickScrubber Pad. Scrub this onto the liner around the hole, ensuring there is a band at least the size of the repair patch.
- The QuickPrime Plus should be allowed to go off until it is touch dry. Remove the backing paper and place the patch face down on the bottom liner over the hole.
- Use the Seam Roller to firmly press the patch onto the liner. This ensures there are no bubbles and that the patch is evenly bonded to the liner. Do not use your hands as the pressure will not be distributed evenly.
Pond Liner Patch Repair
This method uses a piece of Elevate or SealEco EPDM pond liner which is then attached to the original pond liner. This method can be used for multiple, larger holes and tears.
What you need:
Pond Liner (matching the liner in your pond)
With,
Or,
QuickSeam Tape
QuickPrime Plus
QuickScrubber Pad
Seam Roller
Method:
- Cut the piece of pond liner down to the size required to comfortably cover the hole or tear. Round the corners of the patch (the rounded corners are less likely to catch against anything and pull the patch off).
- Place the patch on the liner and draw around the patch.
- Clean the area to be repaired, removing all dirt, grime and algae.
- Add a small amount of the QuickPrime Plus onto the QuickScrubber Pad. Scrub this onto the two surfaces that are to be joined, ensuring there is a band of at least 100mm on each piece. On the original liner, this should go inside the drawn line and on the patch up to the edge of the liner. Ensure the QuickPrime Plus is applied evenly, without streaks or puddling.
- The QuickPrime Plus should be allowed to go off until it is touch-dry. Place the QuickSeam Tape face down on the patch, ensuring that there is an unbroken line of tape around the edge of the patch (the Tape can be overlapped where necessary).
- Use the Seam Roller to firmly press the QuickSeam Tape onto the patch. This ensures there are no bubbles and that the Tape is evenly bonded to the liner. Do not use your hands as the pressure will not be distributed evenly.
- Do not peel off the backing of the QuickSeam Tape. Place the patch over the bottom liner and line it up so that all the holes are covered.
- One side at a time carefully remove the backing paper from the QuickSeam Tape (it is best to do this by pulling it off at a 45-degree angle to the tape) whilst simultaneously pressing the patch down onto the original liner.
- Use the Seam Roller to apply firm pressure firstly across, then along, the length of all the patch sides, including the edge, to ensure the whole join area is evenly bonded to both sides. Do not use your hands as the pressure will not be distributed evenly.
